


 View List
This document was translated by GPT-4
# 1. View List
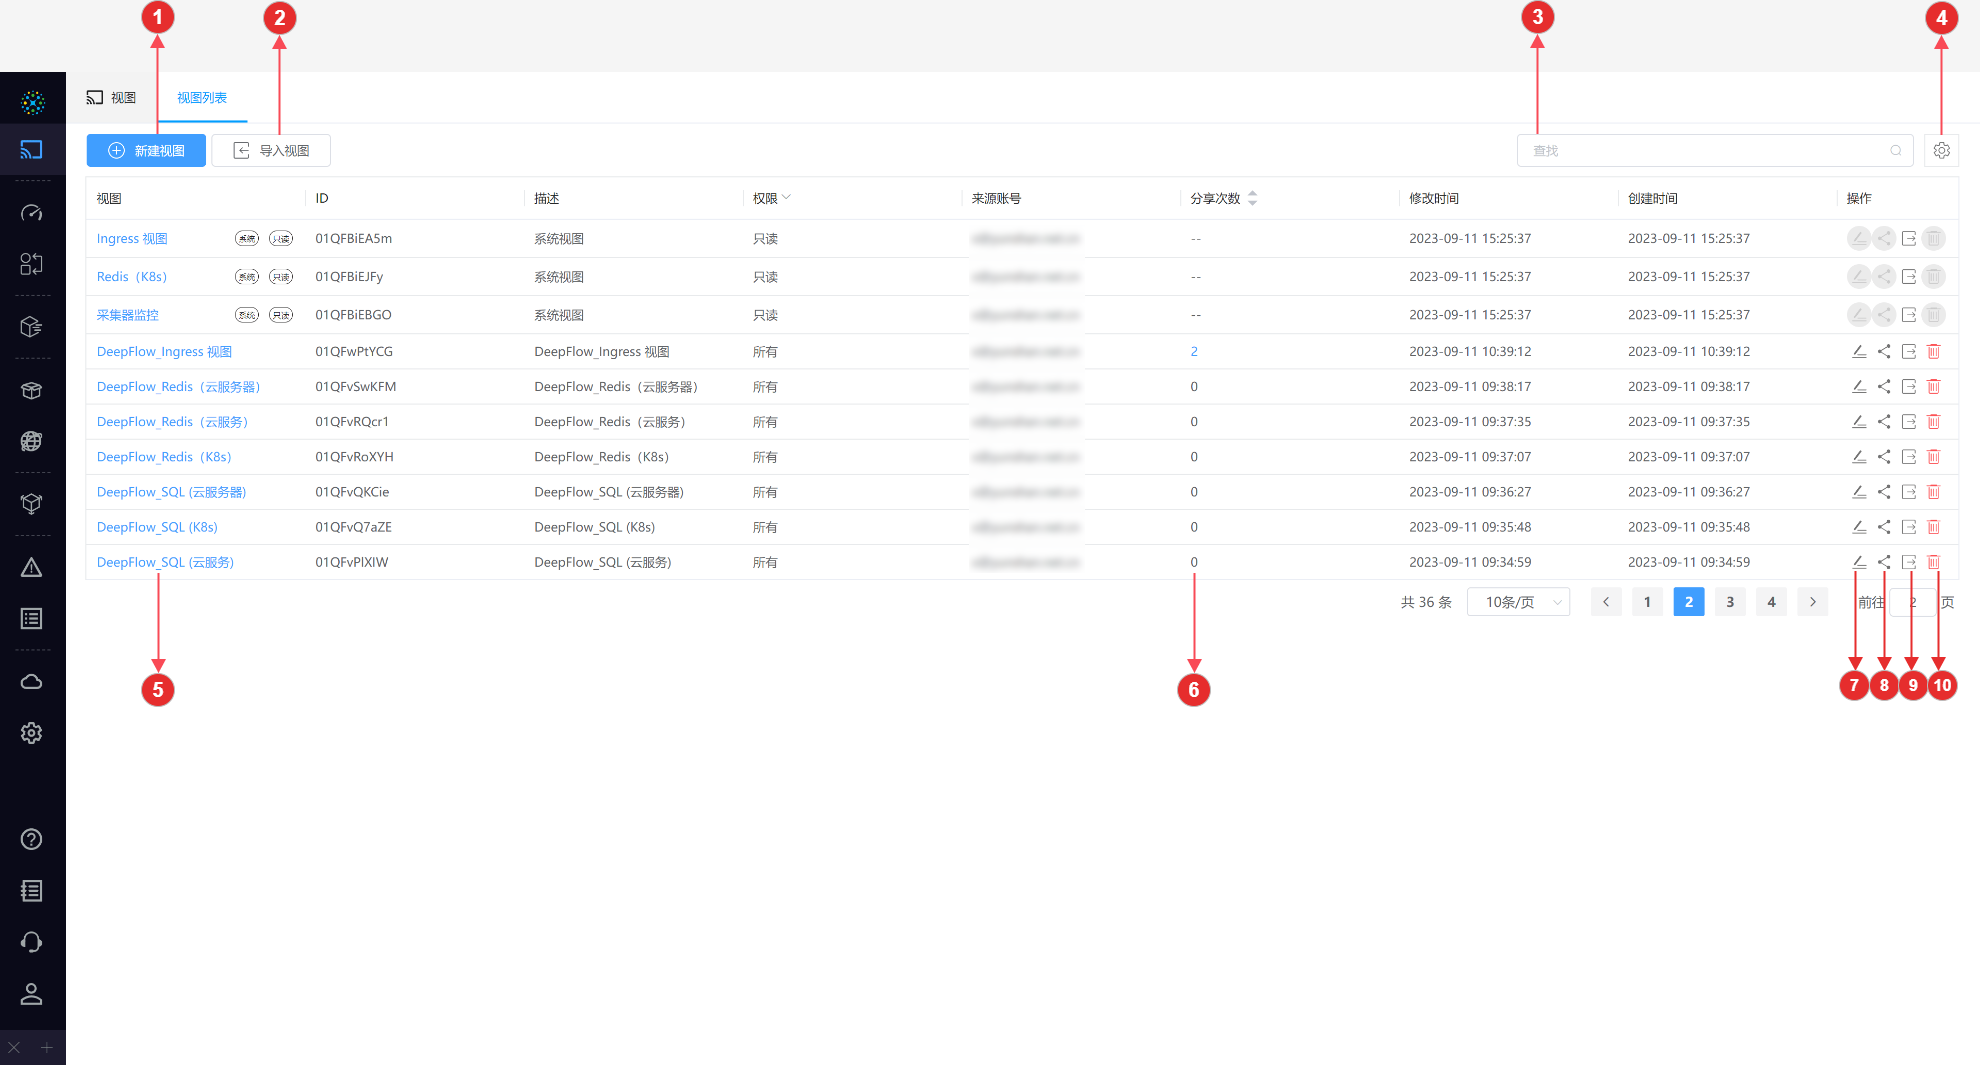
The view list page displays all the views created by the current user and some basic operations.
2_1
- ① New View: Click on New View, enter the name for the new view, and create your view. You can choose to describe the view based on your needs.
- ② Import View: Click on Import View, where you can define a name and import a JSON file. Note: Currently, only JSON view files exported by DeepFlow are supported. For more details, please refer to
⑨ Export. - ③ Settings: Click on options within the gear icon to adjust the column width settings, like evenly distributing column widths or distributing the column widths according to content.
- ④ Search: You can input any string like names, ID, account, description, creation time, etc. into the search bar to perform real-time matching of list information.
- ⑤ Enter View: Click on the name to access the view detailed page and view its corresponding visualization panel.
- ⑧ Share: You can share the view with one or more accounts by controlling read and write permissions.
- ⑥ Share Management: Click on the number to check the sharing details of the view, you can also cancel sharing from here.
- ⑦ Edit: You can modify the name and description of the view.
- ⑨ Export: You can export the view in JSON format.
- ⑩ Delete: You can delete the view. Note: Once a view is deleted, it will also be deleted from the accounts it was shared with.